
Quick Answer
For one indicator LED in a simple series circuit, calculate the current-limiting resistor with R = (VDRIVE − VF − VSWITCH) / ILED. Use the supply or loaded GPIO output voltage for VDRIVE, the LED forward voltage at the intended current for VF, and any transistor or GPIO output drop for VSWITCH. Select a nearby standard resistor value—usually rounding upward when protecting the LED is the priority—then verify brightness, resistor power, GPIO current, voltage tolerance, LED temperature, and worst-case component variation.
A resistor limits current; it does not create an accurate constant-current source. It is a good fit for many low-power indicator LEDs on a reasonably stable rail. Use a dedicated LED driver or constant-current circuit when supply range, LED power, brightness matching, efficiency, thermal behavior, or series-string voltage makes the resistor solution unreliable.
Why an LED Needs Current Limiting
An LED is not a fixed resistance. Once its forward voltage is reached, a small voltage increase can produce a large current increase. Connecting an ordinary indicator LED directly across a low-impedance supply can exceed the LED, GPIO, transistor, or connector rating. The result may be immediate failure, gradual loss of brightness, a stressed microcontroller pin, or a circuit whose current changes sharply with temperature and part variation.
The series resistor takes the voltage that is not dropped by the LED and converts it into a controlled current according to Ohm’s law. Analog Devices’ guide to driving LEDs from push-pull outputs expresses the same design relationship while including the output-pin voltage drop. That extra term matters: a loaded GPIO high is not always equal to its supply, and a loaded GPIO low is not always exactly ground.
Current limiting belongs in a complete schematic review checklist because the resistor value affects several blocks at once: LED brightness, MCU pin current, battery life, thermal margin, PWM behavior, and whether the user can see the indicator in the real enclosure.
LED Current-Limiting Resistor Formula
For an LED and resistor connected in series to a voltage source:
R = (VSUPPLY − VF) / ILED
When a GPIO or transistor drives the LED, use the voltage available across the resistor rather than the ideal rail voltage.
- GPIO sourcing current:
R = (VOH − VF) / ILED - GPIO sinking current:
R = (VSUPPLY − VF − VOL) / ILED - Low-side transistor or MOSFET: subtract the transistor’s on-state drop at the intended current.
Use amperes in the equation. For example, 5 mA is 0.005 A. The calculated result is the theoretical resistance for the chosen input values; it is not automatically the correct production part.
Worked example: 3.3 V red indicator LED
Assume a 3.3 V source, an LED forward voltage of 1.9 V at the intended operating point, and a target current of 5 mA:
R = (3.3 V − 1.9 V) / 0.005 A = 280 Ω
A designer might select 300 Ω or 330 Ω, depending on the available resistor series, desired brightness, and worst-case analysis. With 330 Ω and the same assumed voltages, the nominal current is about 4.2 mA. If a GPIO drives the LED, repeat the calculation with the guaranteed loaded VOH or VOL, not 3.3 V or 0 V by assumption.
Choose a Standard Value and Check Both Current Corners
The calculated resistance may not be a stocked E-series value. Rounding upward reduces current for the nominal assumptions, which is often a sensible first choice for an indicator. It is not the end of the design. A larger resistor may make the LED too dim at low supply voltage, high forward voltage, cold temperature, or a loaded GPIO output. Choose one or more candidate values, then calculate both the maximum-current and minimum-current corners.
For an ideal voltage source, the bounding equations are:
IMAX = (VDRIVE,MAX − VF,MIN − VSWITCH,MIN) / RMINIMIN = (VDRIVE,MIN − VF,MAX − VSWITCH,MAX) / RMAX
As an illustration, assume a nominal 3.3 V source with ±5% tolerance, an LED forward-voltage range of 1.7 V to 2.1 V at the relevant current and temperature, and a 330 Ω resistor with ±5% tolerance. Ignoring driver drop only for this example, the high-current corner is approximately (3.465 − 1.7) / 313.5 = 5.6 mA. The low-current corner is approximately (3.135 − 2.1) / 346.5 = 3.0 mA. Both results differ materially from the 4.2 mA nominal calculation.
For a real GPIO, replace the ideal source with the manufacturer’s guaranteed output specification at the selected drive strength. Also check whether several LEDs can switch on together. Per-pin current may pass while the total current for one port, supply domain, or device exceeds its allowed operating condition.
Adding indicator LEDs to a hardware product?
Describe the supply range, LED color and forward voltage, GPIO limits, brightness target, duty cycle, and power budget. Create a free account to start a reviewable, editable KiCad first draft.
Illustrative LED Resistor Table
The following table behaves like a compact calculator example for a 3.3 V ideal source and 5 mA target. The forward-voltage values are assumptions, not universal values for each color. Replace them with the selected LED’s datasheet values and include the real driver voltage drop.
| Illustrative LED | Assumed VF | Calculated R at 5 mA | Example rounded value | Approx. current |
|---|---|---|---|---|
| Red indicator | 1.8 V | 300 Ω | 330 Ω | 4.5 mA |
| Green/amber example | 2.1 V | 240 Ω | 270 Ω | 4.4 mA |
| Blue/white example | 2.9 V | 80 Ω | 100 Ω | 4.0 mA |
The blue/white example has little voltage headroom. A lower supply, higher LED forward voltage, or loaded GPIO output can reduce the current sharply or prevent reliable illumination. That is a reason to review the complete circuit rather than selecting a resistor from LED color alone.
LED Resistor Design Checklist
| Review item | What to verify | Why it matters |
|---|---|---|
| LED data | Part number, color, forward-voltage range at current, recommended current, absolute maximum, and temperature behavior. | Color and package do not define one fixed forward voltage. |
| Drive voltage | Supply tolerance or guaranteed GPIO VOH/VOL at the intended drive mode and current. |
The output pin is not an ideal voltage source. |
| Target current | Choose the current needed for visible brightness in the enclosure, not automatically the LED maximum. | Modern indicator LEDs can be bright well below 20 mA. |
| Worst-case current | Check maximum drive voltage, minimum LED forward voltage, minimum resistor tolerance, and lowest switch drop. | Nominal current may hide the highest electrical stress. |
| Minimum brightness | Check minimum drive voltage, maximum LED forward voltage, maximum resistor tolerance, and temperature. | A protected LED can still be too dim or fail to turn on reliably. |
| GPIO budget | Per-pin source/sink current, output-voltage guarantees, configured drive strength, and total port/device limits. | Several safe individual LEDs can exceed the combined MCU current budget. |
| Power rating | Calculate resistor dissipation and apply thermal, ambient, pulse, and derating margin. | Higher supply voltage can make resistor heating the real constraint. |
| PWM and states | Peak current, duty cycle, reset state, boot behavior, active-high/low polarity, and sleep leakage. | PWM changes average brightness but does not remove the peak-current requirement. |
How to Calculate the Resistor Power Rating
Calculate the resistor’s dissipation with either:
P = I²RP = VRESISTOR × IP = VRESISTOR² / R
In the 3.3 V, 1.9 V, 330 Ω example, the resistor drops about 1.4 V at 4.2 mA and dissipates roughly 6 mW. That is small for many SMD resistors, but do not generalize from a low-voltage indicator. A 24 V control panel, an automotive LED, or several LEDs can dissipate far more power. Check the resistor manufacturer’s rating at the real ambient temperature, PCB copper, package size, pulse pattern, and enclosure conditions; do not operate continuously at the headline power rating without appropriate margin.
GPIO Source, Sink, and PWM Checks
A microcontroller pin may source current into a resistor and LED to ground, or sink current from a supply-connected LED. Both can work, but the equations and active polarity differ. Sinking often gives a different current capability and makes the LED active-low; sourcing makes it active-high. Firmware, boot configuration, and reset defaults must match the schematic.
For an nRF52840 example, the Nordic GPIO electrical specification lists different guaranteed output levels and currents for standard and high-drive modes. A resistor calculation should use those loaded output specifications and check the selected drive configuration. The absolute maximum rating is not a recommended continuous operating point.
PWM controls average LED brightness by switching the current on and off. The series resistor must still limit the instantaneous on-current. Verify the peak current, duty cycle, PWM frequency, GPIO transition behavior, LED pulse rating, visible flicker, camera interaction, and power consumption. Do not multiply the resistor value by duty cycle as though the LED receives a smaller peak voltage.
One Resistor Per LED and Other Topology Rules
LEDs connected in series share the same current, so one resistor can limit the string if the supply provides enough headroom for the sum of forward voltages plus driver drop. LEDs connected in parallel should normally have individual resistors or controlled current paths. Small forward-voltage differences can make one parallel LED take more current and heat up, which can further change current sharing.
The resistor may be placed on the anode side or cathode side of one series LED; the same current flows through both parts. PCB placement is usually not as high-frequency-critical as a decoupling capacitor, but the schematic should keep the resistor clearly associated with its LED and control signal. Check LED polarity, connector orientation, test access, silkscreen, optical location, and whether the indicator will be blocked by the enclosure. The KiCad schematic-to-layout checklist covers those handoff questions.
Example From a Real SpeedUp Project

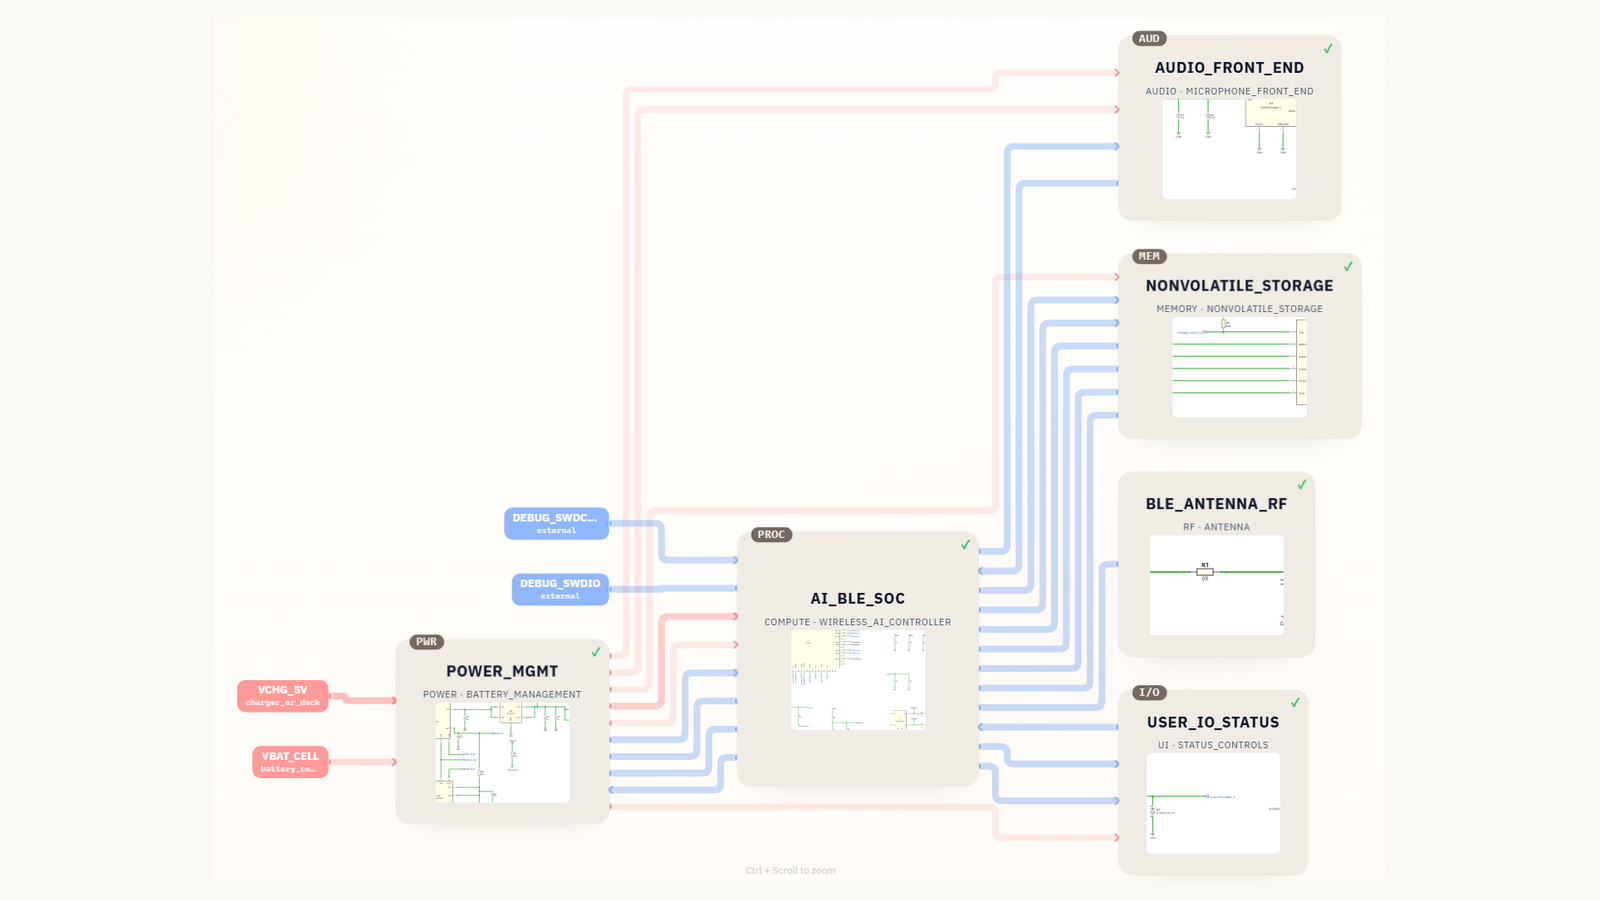
The magnetic AI microphone / AI recorder KiCad project includes two indicator paths. UI_RECORD_LED_EN drives LED D5 through R23 = 680 Ω, while UI_STATUS_LED_PWM drives D6 through R24 = 680 Ω. Separate resistors are the right structural pattern because each LED has its own control signal and current path.
The screenshot does not prove that 680 Ω is the final production value. The generated symbol records part names for a red and yellow LED, but the KiCad datasheet fields are empty. A reviewer must still obtain the real LED forward-voltage curves, confirm the nRF52840 supply and GPIO drive mode, calculate high- and low-current corners, check brightness through the product enclosure, and verify resistor footprints and power. This is exactly the difference between a useful schematic draft and a validated circuit.
Verify the LED Current on the Bench
Measure the voltage across the series resistor while the LED is on, then calculate current with I = VRESISTOR / R. This avoids adding an ammeter in series and disturbing a small circuit. Use a meter or oscilloscope with suitable input impedance and bandwidth, and confirm the actual resistor value when accuracy matters.
For PWM, observe the resistor voltage during the on pulse as well as its average. The peak waveform confirms whether the resistor limits current as intended; the duty cycle determines average current and brightness. Check startup, reset, firmware update, sleep, and fault states because the LED may turn on continuously before PWM begins or while a pin is still in its default configuration.
Test at minimum and maximum supply voltage, across representative temperature, and with the real diffuser, light pipe, window, or enclosure. Human-visible brightness does not scale linearly with current, and two LEDs with the same calculated current can look different because of color, viewing angle, optical efficiency, and binning. Record the chosen current and acceptance criteria so a later LED substitution does not silently invalidate the resistor value.
When a Series Resistor Is Not Enough
Use a current-regulated driver rather than a simple resistor when the LED is high power, the supply varies widely, several series LEDs approach the supply voltage, brightness matching matters, thermal changes are large, or efficiency is important. Battery systems can be especially awkward: LED current may change from a fully charged cell to the end-of-discharge voltage, and a blue or white LED can lose headroom before the rest of the system stops working.
A constant-current sink, linear LED driver, or switching LED driver regulates current more accurately. It adds component, thermal, layout, and sometimes EMI requirements, so choose it for a defined reason. For a low-current status LED, a resistor is often simpler and entirely adequate after worst-case review.
Common LED Resistor Mistakes
- Using 220 Ω by habit: the correct value depends on supply, LED forward voltage, current, and driver drop.
- Calculating from the LED maximum current: an indicator may meet brightness requirements at a much lower, safer current.
- Ignoring GPIO output droop: the pin’s guaranteed
VOH/VOLchanges with current and drive mode. - Checking only nominal values: supply, forward voltage, resistance, temperature, and tolerance move the current.
- Sharing one resistor across parallel LEDs: current may not divide predictably.
- Applying PWM without peak-current analysis: duty cycle reduces average light but does not automatically protect the on-state path.
- Forgetting resistor power: a higher-voltage system can overheat a small resistor even at modest LED current.
- Leaving the LED datasheet blank: color and footprint are not enough to validate forward voltage, current, polarity, and luminous output.
How SpeedUp Fits
SpeedUp can turn a product prompt into an editable KiCad draft that shows indicator LEDs, series resistors, GPIO control nets, power domains, and intended functions. That makes missing resistors, shared current paths, active-low behavior, and unresolved part data visible early. The goal is not to claim that one generated resistor value is automatically correct; the goal is to give an engineer a structured circuit they can calculate, inspect, and revise.
Engineers still verify the LED and MCU datasheets, electrical corners, power, brightness, PCB placement, firmware states, sourcing, thermal behavior, EMC, manufacturing, and enclosure optics. Related component-review guides include the decoupling capacitor value and placement guide and the flyback diode polarity and sizing guide.
FAQ
What resistor should I use for an LED?
Calculate R = (VDRIVE − VF − VSWITCH) / ILED, then select a standard value after checking maximum current, minimum brightness, GPIO limits, resistor power, and tolerances. There is no universal resistor for every LED.
Why is 220 Ω often used with LEDs?
It is a convenient common value that produces a visible current in some 3.3 V or 5 V beginner circuits. It may be too low, too high, or impossible to use in another circuit. Calculate from the actual voltage, LED, target current, and output driver.
Can the resistor go before or after the LED?
Yes. In one simple series branch, the same current flows through the resistor and LED, so the resistor can be on the anode or cathode side. Keep the schematic clear and preserve the intended active-high or active-low drive topology.
Do I need a resistor when using PWM?
Usually yes for a basic voltage-driven indicator LED. PWM controls average brightness, while the resistor or current driver limits the instantaneous current during each on pulse.
Can multiple LEDs share one resistor?
Series LEDs can share one resistor because they carry the same current, provided the supply has enough voltage headroom. Parallel LEDs should normally have individual resistors or regulated current paths because their forward voltages and current sharing differ.
Should I use a resistor or a constant-current LED driver?
Use a resistor for many low-current indicators on a stable rail. Consider a constant-current driver for high-power LEDs, wide supply ranges, series strings, matched brightness, better efficiency, or applications where LED current must remain controlled across temperature and battery voltage.
Start Your Indicator Circuit Project
Put the LED branches inside a complete, reviewable product schematic instead of sizing them in isolation.
Use SpeedUp to turn the product requirements into structured schematic sheets and an editable KiCad first draft for engineering review. Create a free account to begin.
Comments
No comments yet.
Leave a Reply